How to change the page font
Right now, the only way to change a font for the whole page is through custom CSS.
There are two steps: loading the font, and applying it to the page.
Loading the font
Google Fonts
Google Fonts is one of the biggest free font repositories.
Go to Google Fonts. Click on a font, e.g. Lora.
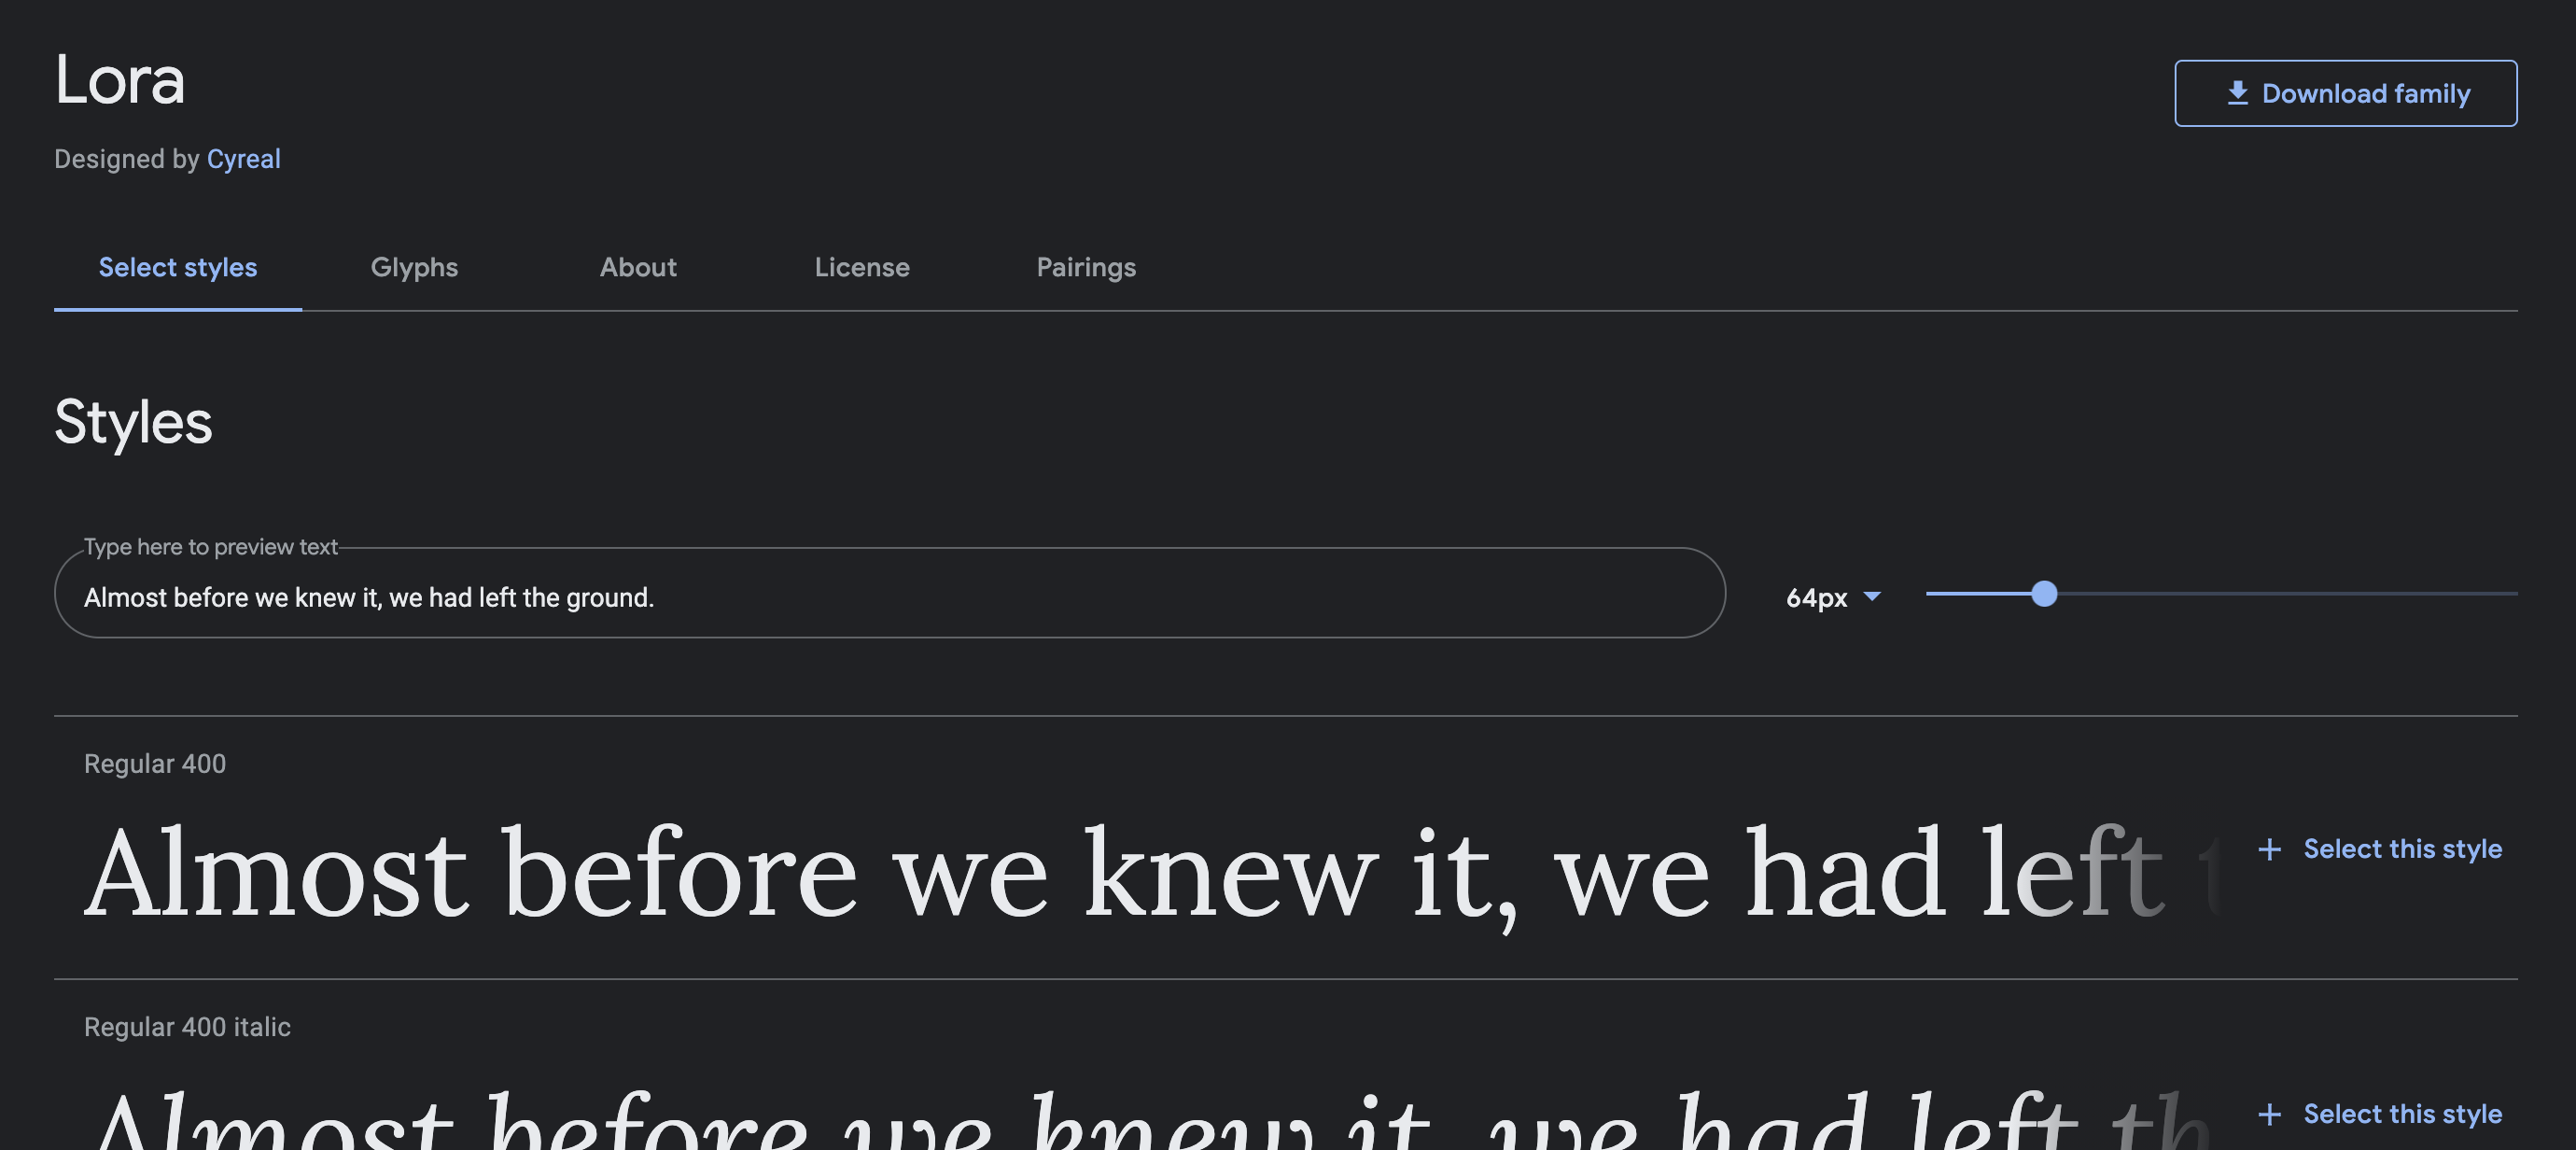
Click "Select this style" for the following styles: Regular 400, Regular 400 italic, Bold 700, Bold 700 italic. If some of those are missing, it's alright.
A side bar will appear. Under "Use on the web", choose @import.
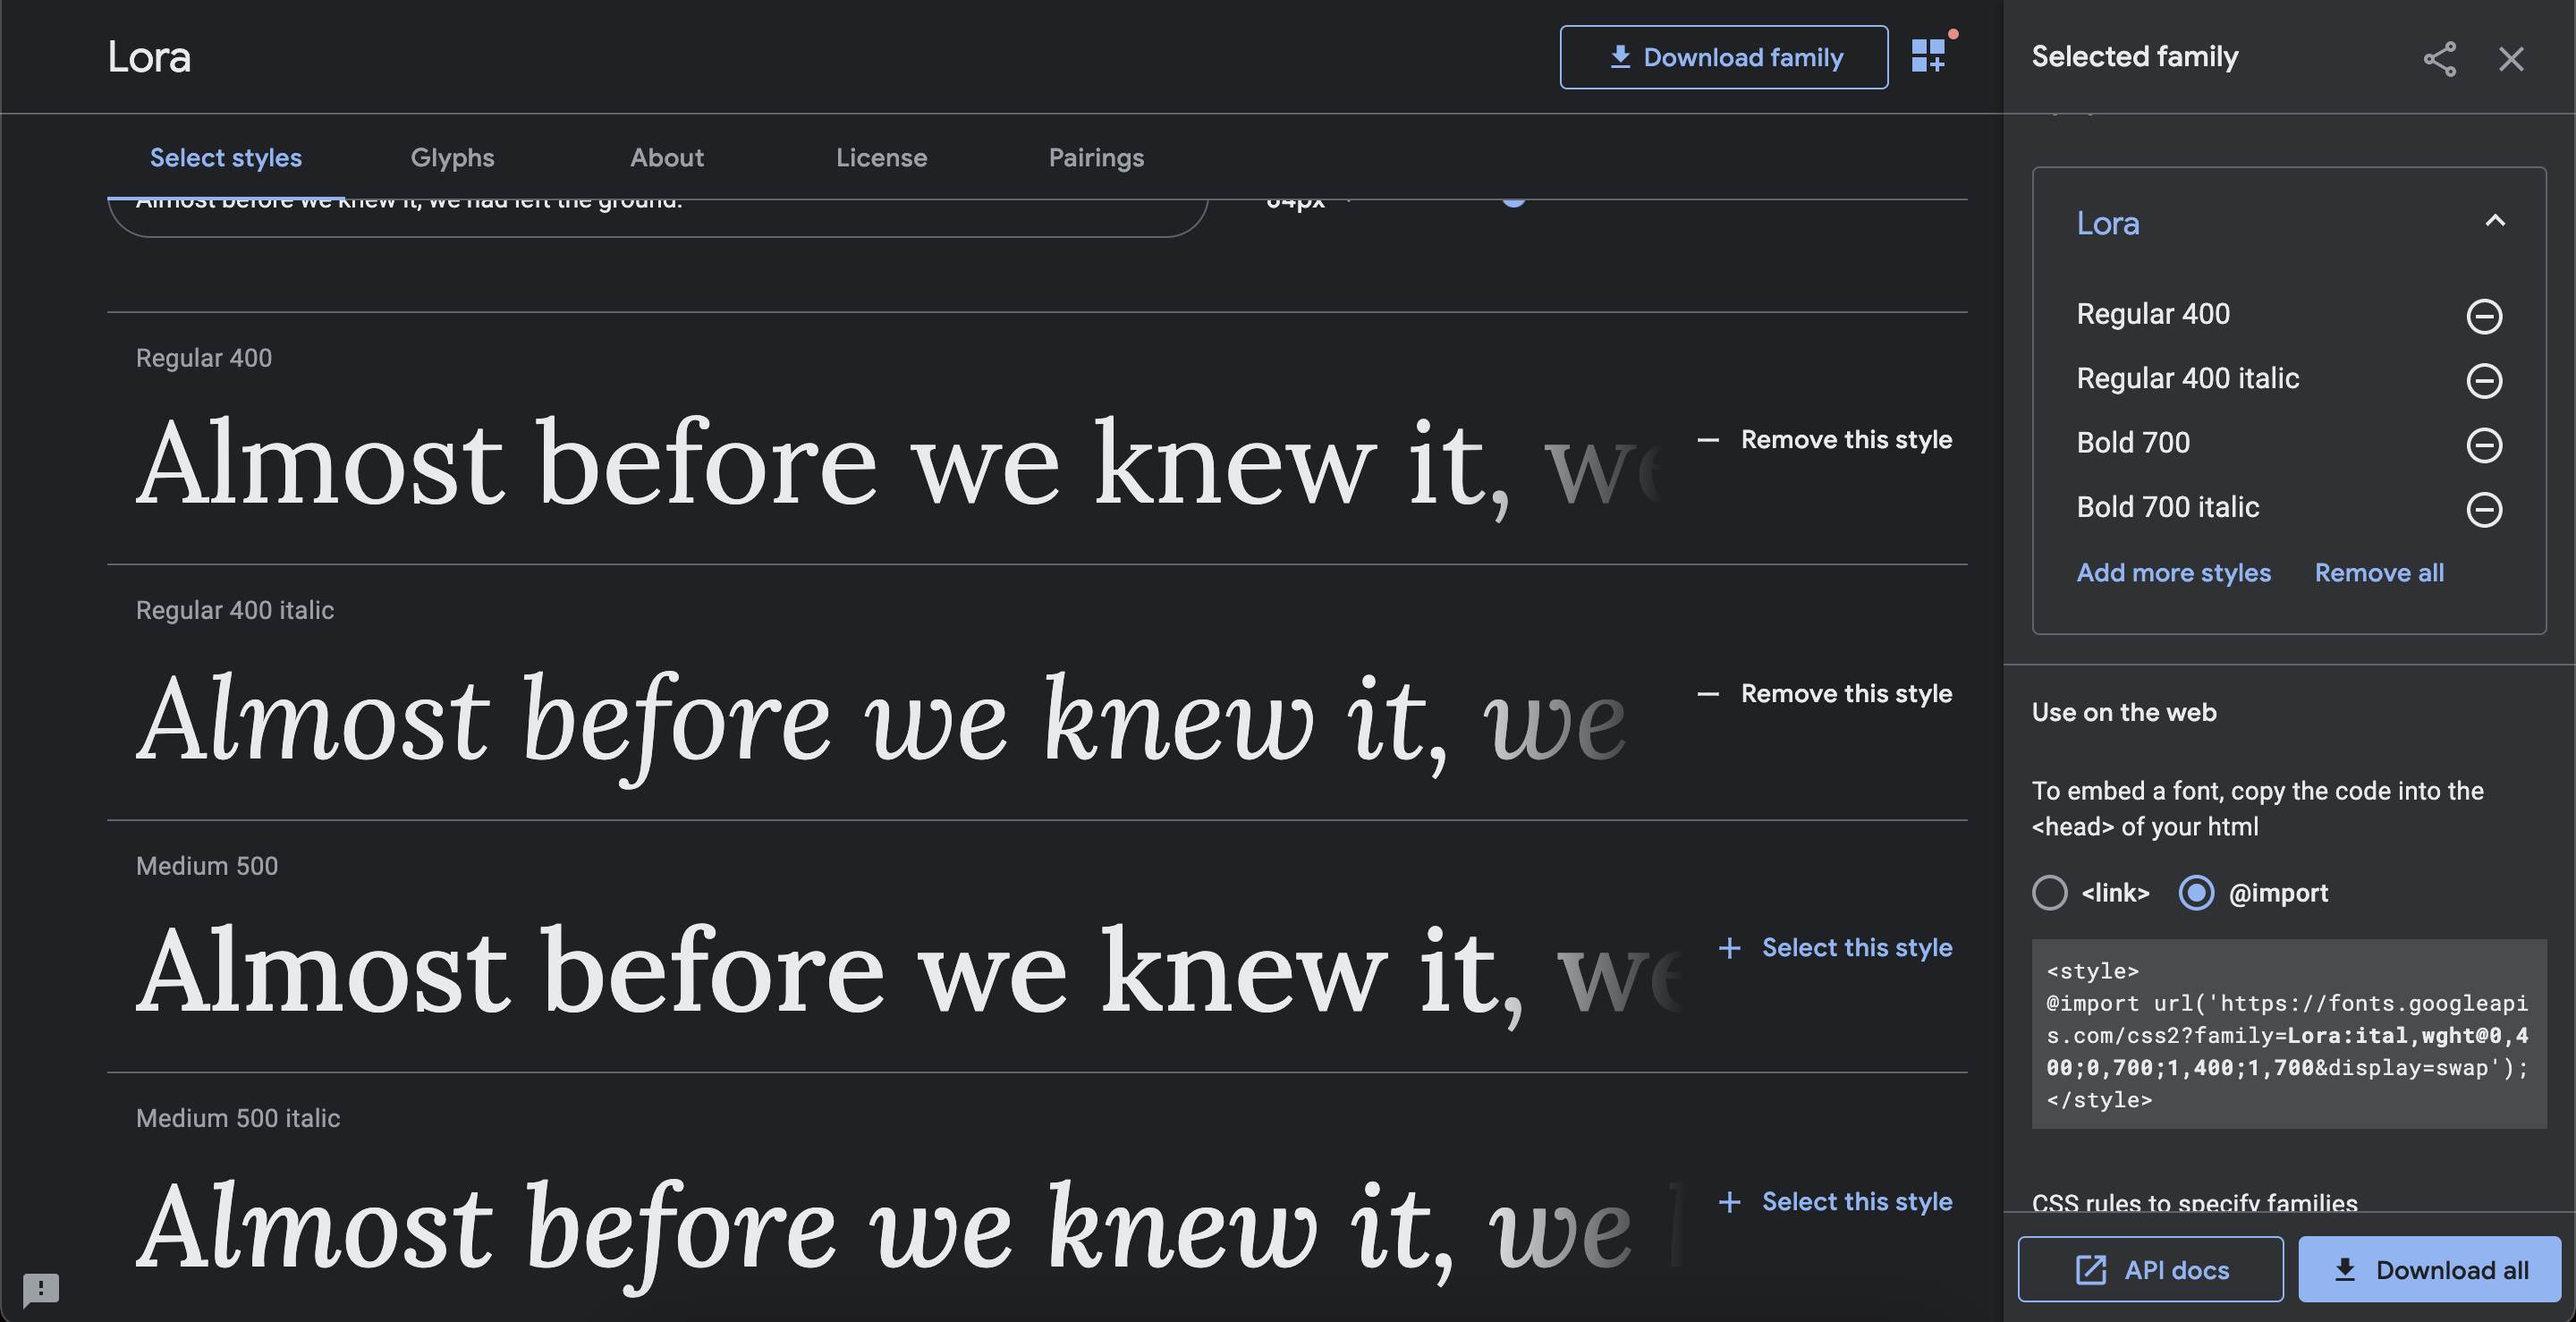
Copy the piece of code between <style> and </style>. This is the piece of code we will need for the next step, "Applying the font to the page".
Applying the font to the page
Importing the font
Click on the page menu, then "Design".

Choose the "Customizations" tab.
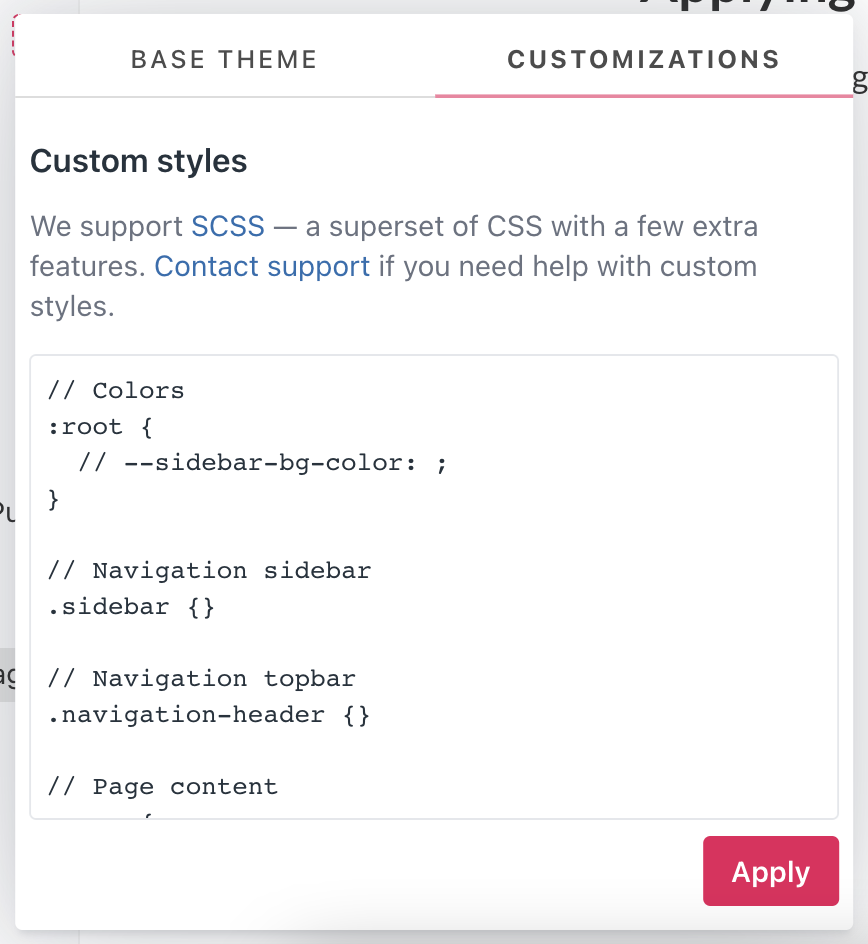
Before everything else in the textbox, add the piece of code we've gotten at the previous step. For Google Fonts it will look like this:
@import url('https://fonts.googleapis.com/css2?family=Lora:ital,wght@0,400;0,700;1,400;1,700&display=swap');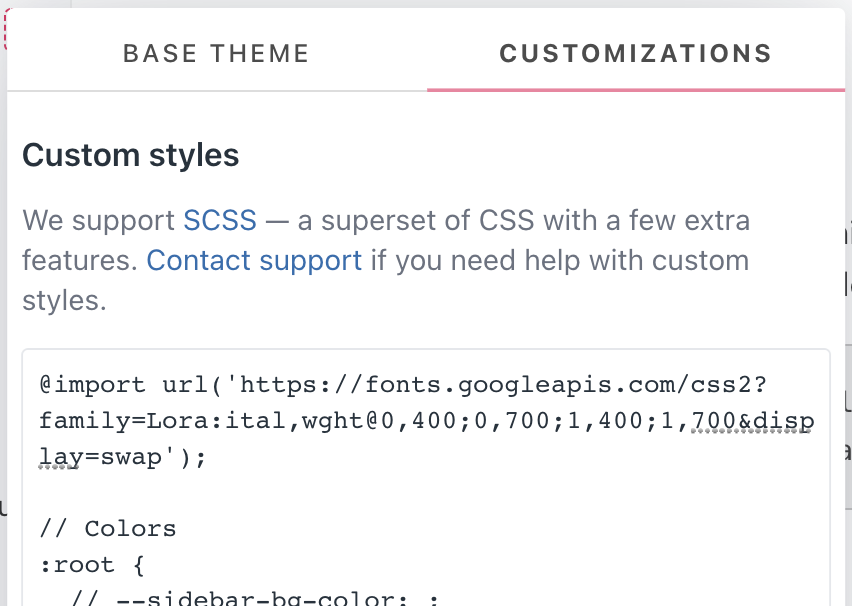
Choosing the elements
Next, you have to specify which elements of the page should get the font.
To apply it to the whole page, add the following piece of code in the "Customizations" tab:
.page {
  font-family: 'Lora';
}
To apply it to headings, add the following piece of code:
.page {
  h1, h2, h3, h4 {
    font-family: 'Lora';
  }
}
Font weights
You might want to use a different font weight. The font weights usually range from 100 (very thin and light) to 900 (very heavy). Here's how you can specify the font weight for the page:
.page {
  font-family: 'Lora';
  font-weight: 200;
}
However, to use different fonts weights you will need to make sure to select them in the "Loading the font" step. If you'd chosen Regular 400 and Bold 700, only those two font weights will be available.